
The Timeless Art of Canning 🍓 Preserving the Bounty of Nature
In a world where we can enjoy fresh produce year-round, it's easy to forget the joy of savoring the flavors of summer long after the season has passed. Canning, a time-honored preservation method, allows us to do just that. Whether you're a seasoned home canner or a curious beginner, this blog will explore the wonderful world of canning – from the basics to advanced techniques, safety tips, and the myriad of culinary possibilities it offers.
Chapter 1: The Basics of Canning
Canning, at its core, is a method of preserving food by sealing it in airtight containers to prevent spoilage. Here are the two primary methods of canning:
- Water Bath Canning: This method is suitable for high-acid foods like fruits, tomatoes, and pickles. The process involves submerging jars in boiling water for a specified time to kill bacteria, yeasts, and molds. The high acidity of these foods helps create a hostile environment for spoilage microorganisms.
- Pressure Canning: Low-acid foods such as vegetables, meats, and poultry require pressure canning. This method involves using a pressure canner to reach higher temperatures (typically around 240°F or 116°C) necessary to kill harmful bacteria like Clostridium botulinum.
Chapter 2: Essential Tools and Equipment
Before you start canning, you'll need the right tools and equipment. Here's a list of essentials:
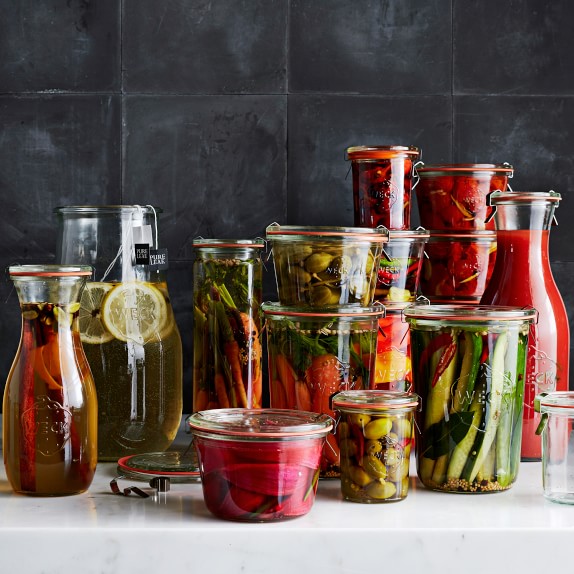
- Glass Canning Jars: Glass canning jars (Weck Jars or Le Parfait Jars) come in various sizes.
- Lids and Bands: Ensure your lids have a good seal. Bands can be reused if they're in good condition.
- Canning Pot: For water bath canning, a large, deep pot with a rack is essential. For pressure canning, you'll need a pressure canner.
- Jar Lifter and Funnel: These tools help you safely handle hot jars and fill them without making a mess.
- Headspace Tool: Used to measure the proper amount of empty space (headspace) at the top of each jar.
- Clean Towels and dishcloths: Keep your workspace clean and dry.
Chapter 3: The Canning Process
Now, let's dive into the canning process itself, which generally follows these steps:
- Preparation: Clean and sterilize your jars, lids, and bands. Wash and prepare your ingredients, following your chosen canning recipe.
- Filling Jars: Use a funnel to fill the jars with the prepared food. Leave the recommended headspace to allow for expansion during processing.
- Removing Air Bubbles: Slide a clean knife or a bubble remover tool along the inside of the jar to release trapped air bubbles.
- Wiping Jar Rims: Before placing lids on the jars, wipe the rims with a clean, damp cloth to ensure a good seal.
- Sealing Jars: Apply the bands, the lids, and the clamps.
- Processing: Place the filled jars in the canner, ensuring they are fully submerged in boiling water (for water bath canning) or follow the manufacturer's instructions for pressure canning.
- Cooling and Sealing: After processing, remove the jars and let them cool on a clean towel.
Chapter 4: Safety First
When it comes to canning, safety is paramount. Follow these safety guidelines:
- Use Tested Recipes: Always use recipes from trusted sources like the USDA or reputable canning books to ensure the safety of your preserved foods.
- Maintain Cleanliness: Keep your workspace and equipment clean to prevent contamination.
- Respect Processing Times: Follow recommended processing times and temperatures meticulously to destroy harmful microorganisms.
- Storage: Store sealed jars in a cool, dark, and dry place. Check seals periodically, and discard any jars with compromised seals.
Canning is not just a method of food preservation; it's an art that allows us to capture the essence of the seasons and enjoy delicious homemade foods throughout the year. Whether you're pickling cucumbers, making jams from fresh berries, or pressure-canning hearty stews, the process of canning is both rewarding and deeply satisfying. With the right knowledge and tools, you can embark on a culinary journey that will enhance your appreciation of food and its connection to the changing seasons. So, roll up your sleeves, gather your ingredients, and start preserving the harvest – you won't be disappointed!


